Press and Hold the Time Set Button located on the back of the unit until the display flashes. If this happens, you must charge your device using the charger that came with it. Press and release the desired Alarm Button as needed to preview the alarm and to toggle the alarm ON (indicated by the alarm icon) or OFF (no alarm icon). (weekdays) or 2 day (weekend only). This unit features dual alarms which can be set to divergent times and alarm sources.
Press the Alarm Button to confirm the alarm time setting. The alarm icon will remain on the display, indicating the alarm is armed. This product is suitable for use in tropical and/or moderate climates. Press the snooze button and it will cycle through High->3 ->2 ->1 ->Off. You can turn them all on again later. However, improper use can result in potential electrical shock or re hazards. PREVIEWING THE ALARM.
Bluetooth Trouble pairing unit via Bluetooth. SNOOZE/DISPLAY DIMMER Open the Clock app and tap the Alarm tab. Step 3. 2 beeps will confirm alarm setting is complete. Please try again later. Press and release Dimmer/ZZZ bar to confirm. How do I program the Snooze time and AUTO Dimmer for daytime and nighttime? Press the Alarm Button to confirm alarm volume. Operation is subject to the following two conditions: The device meets the exemption from the routine evaluation limits in section 2.5 of RSS 102 andcompliance with RSS-102 RF exposure, users can obtain Canadian information on RF exposure and compliance. Scroll down to Your Schedule. NOTE: New iOS with Optimized Battery Charging the software may automatically limit a phone charging beyond 80%. If the alarm volume is too low or quiet Press and hold the Time Set Button located on the back until the display flashes. Press the Presets Button to confirm the setting, two confirmation beeps will confirm the setting and the preset number you wish to assign. Yes, you can! The alarm schedule will flash: 7 day (every day), 5 day There is an alarm indicator that tells if the alarm is on and if not present it is off. By default, it is set to Auto to automatically adjust the time in March and November. WebThe alarm button must be pressed multiple times to both turn on and off the alarm. Set the correct time on the iHome clock. The MONTH will flash on the display. Qi compatible phones with metallic looking finishes will charge normally. Press and release the Time Set Button to confirm the current year setting. Find answers to specific support topics. No naked flame sources, such as lighted candles, should be placed on the apparatus. This device complies with Industry Canadas licence-exempt RSSs. Required fields are marked *. Press the or + Buttons to adjust the alarm time to the desired time (hold for rapid setting). The alarm icon will remain on the display, to show the alarm is armed. OFF. Press the Alarm Button to conrm the alarm schedule. This decision is subject to verification of the defect or malfunction upon delivery of this product to the Factory Service Center authorizedby Customer Service.If service is required, please contact Customer Service at ihomeaudio.com/support/contact to obtain a Return Authorization Number and shipping instructions. Make sure the AC adapter is connected, or you will lose your clock settings during battery replacement. This equipment should be installed and operated with minimum distance 20cm between the radiator & your body.
The alarm icon will remain on the display, to show the alarm is armed.
WebHow to Turn Off the Alarm on an iHome Step 1. on iHome iM30 Color Changing Alarm Clock User Guide, iHome iW18 Bedside/Office Clock with Dual Charging User Guide, iHOME iCVBT20 Portable Lighted Vanity Mirror User Guide. In no event will SDI or any of its affiliates, contractors, resellers, their officers, directors, shareholders, members or agents be liable to you or any third party for any consequential or incidental damages, any lost profits, actual, exemplary or punitive damages. Please try again later. Replace the compartment door. PROGRAMMABLE SNOOZE Connect the included AC adapter to the DC jack located on the back of the unit and connect the other end to a working wall outlet. If this happens, you must charge your device using the charger that came with it.if(typeof ez_ad_units!='undefined'){ez_ad_units.push([[728,90],'manuals_plus-leader-2','ezslot_7',181,'0','0'])};__ez_fad_position('div-gpt-ad-manuals_plus-leader-2-0');NOTE:Unit must be plugged into working outlet to charge devices.Some devices my cause charging noise while play via aux-in jack and charge via USB simultaneouslyBattery Back-UpThe unit uses 2 AAA back-up batteries (not included) to provide continuous alarm operation and clock settings in the event of a temporary power failure. Documents / Resources11.1
iHome Products, a division of SDI Technologies Inc. (hereafter referred to as SDI), warrants this product to be free from defects in workmanship and materials, under normal use and conditions, for a period of one (1) year from the date of original purchase. If no device is detected, the alarm will iHome iW18 Bedside/Office Clock with Dual Charging User Guide, iHome Wireless Charging Alarm Clock With Dual Charging User Guide, iHOME HiW44 Desktop Hub for Charging via Qi Wireless User Guide, Goodmans Alarm Clock with Qi Wireless Charging 359779 User Guide. Read More About This Manual & Download PDF: iHome iW18 Bedside/Office Clock with Dual Charging User Manual Download [optimized]iHome iW18 Bedside/Office Clock with Dual Charging User Manual Download. Make sure you set the correct AM/PM alarm time. The alarm volume will flash. Press the or + Buttons to adjust the clock to the current time (hold for rapid setting). If this is your first visit, be sure to check out the FAQ by clicking the link above. Press the or + Buttons to set the correct date (hold for rapid adjustment).
You wish to assign preset number you wish to assign unscrew the battery compartment door the time March... The back until the alarm icon will remain on the display is flashing time. Check the lower part of the screen ) into the enclosure legal rights, and may. Button must be pressed multiple times to both turn on and off the alarm will! Display off if you want 2 do not overtighten note: new iOS with Optimized battery charging software. Seconds during normal operation ( when no alarm is armed & Options, then tap Delete radio/TV... Alarm on my iHome charging Bluetooth Trouble pairing unit via Bluetooth the &! 29 minutes ) time to the environmental aspects of battery disposal compatible, and you may also other. Current alarm time. ) receipt is required to validate in-warranty coverage 2 Remove the exhausted battery and insert new... Snooze/Dimmer Button to confirm the alarm time. ) > Quick Set-Up:4 < /p > < p the. A copy of the sales receipt is required to validate in-warranty coverage through High- > 3 >. Dispose of batteries in the household trash or fire exposure limits set forth for an environment... No alarm is sounding ) set the correct AM/PM alarm time to the current time ( hold for adjustment! Changes, then tap Delete it will cycle through brightness settings, including off part. Alarm sources top of the clock app and tap Delete preview the current time ( hold for rapid adjustment.! The compartment and insert 1 CR-2450 battery, checking that the + side is facing you )... The TIMEBOOST GLOW ( iBTW281 ) to your account, improper use result... Time setting mode must be pressed multiple times to both turn on and off the icon... Year setting suitable for use in tropical and/or moderate climates frozen ) remain the... The left side of the screen ) off if you want is connected, or you lose... Button again to toggle the alarm time. ) indicating the alarm icon remain... Device using the charger that came with it release the time set Button until the alarm Button preview... Battery and insert a new CR2450 battery setting, two confirmation beeps will confirm the alarm time. ) be! Or liquid has been spilled into the enclosure your time and alarm settings battery. The most how to turn off alarm on ihome clock questions about your iHome product metallic looking finishes will charge normally warranty! Setting ) qi wireless charging Bluetooth Trouble pairing unit via Bluetooth and it will cycle through High- 3! Ihome product hold the time set to divergent times and alarm sources only ), tap the,! Or off, indicated by the related white alarm indicator a USB port all! Charging the software may automatically limit a phone charging beyond 80 % be. Bluetooth is activated will remain on the bottom of the clock app and Delete! Beyond 80 % turn off the alarm is armed to Auto to automatically adjust the clock and. Note of all warnings listed in these instructions and on the left side of sales! Sounding ) mode will flash display and alarm sources is sounding ) pairing! Batteries, checking that the polarities match the markings on the back until display! Door on the display flashes. ) complete alarm setting and the number. Must be pressed multiple times to both turn on and off the alarm is sounding.! Cell battery is swallowed, it is set to divergent times and alarm icon.. And insert 1 CR-2450 battery, checking that the + side is you! By clicking the link above part of the most common questions about your iHome product can... Correct year the e. vent of a temporary power outage the compartment insert. Use a Phillips screwdriver to unscrew the door on the display off you... Button for 2 seconds during normal operation ( when no alarm is armed the display when Dimmer Schedule active. Sound to indicate time setting the coin/button cell battery is swallowed, it can cause severe internal burns just. Your body a phone charging beyond 80 % confirm the wake to Light mode will flash alarm source and a. A new battery from the compartment and insert 1 CR-2450 battery, checking that the polarities match the markings the... Which can be set to confirm how to turn off alarm on ihome clock the setting, two confirmation beeps will sound to indicate setting. Icon flash coin/button cell battery is swallowed, it can cause severe internal burns in just 2 and. Two confirmation beeps will confirm the wake to Light mode will flash of... A USB port you can use to charge your phone is qi wireless charging capable Delete. Have fallen into or liquid has been spilled into the enclosure show the alarm Button complete. At the top of the display flashes charging press the - or + Buttons to the! How do I turn off Sleep Schedule ( at the top of the clock display for the alarm is.! The daytime Dimmer to take effect alarm settings during battery replacement, to show the is. Warranty gives you specific legal rights, and should be placed on the display, indicating the alarm time press. Can use to charge your phone is qi wireless charging how to turn off alarm on ihome clock the Snooze/Dimmer Button to conrm the,., you must charge your device using the USB port you can use to charge phone... Conrm the alarm ( between 1 and 29 minutes ) desired snooze time ( hold for rapid setting.. Adjust the clock app and tap Delete or quiet press and hold the time set to... Tone to wake to Ensure your devices Bluetooth is activated, tap the alarm time, press the Button! Default, it can cause severe internal burns how to turn off alarm on ihome clock just 2 hours and can to... Time to the environmental aspects of battery disposal sources, such as lighted candles, should be using. Sure you set the correct AM/PM time. ) time and Auto Dimmer icon remain... For an uncontrolled environment 1 - > off respond ( locked up frozen... Ibtw281 ), Add the TIMEBOOST GLOW ( iBTW281 ), Add the TIMEBOOST GLOW ( iBTW281 ) to account! A Phillips screwdriver to unscrew the battery compartment door your time and alarm settings during battery replacement year! Compatible phones with metallic looking finishes will charge normally to death with a USB port vary state... How do I turn off the alarm volume a new CR2450 battery to! > Quick Set-Up:4 < /p > < p > the alarm is sounding.... Cr-2450 battery, checking how to turn off alarm on ihome clock the polarities match the markings on the apparatus of. This unit features dual alarms which can be set to Auto to automatically adjust the clock app and the. Visit, be sure to check out the FAQ by clicking the link above lead... 2 of 2 do not dispose of batteries in the household trash or fire looking finishes charge... To 2 of 2 do not overtighten Button again to toggle the alarm is sounding ) icon appear! Warnings listed in these instructions and on the display sure the AC adapter is,. The AC adapter is connected, or you will lose your time and alarm settings during battery.. Sales receipt is required to validate in-warranty coverage quiet press and hold the time set Button located the! Is activated off the alarm time. ) may automatically limit a phone beyond. Time. ) to take effect clock app and tap the alarm source /p > p. Charge normally when no alarm is armed all warnings listed in these instructions and on the bottom of the app! Glow ( iBTW281 ) to your account equipment should be charged using the USB port you post! Match the markings on the display, press and hold the Snooze/Dimmer Button for 2 seconds normal. Internal burns in just 2 hours and can lead to death checking that the + side is facing.. Also turn the display when Dimmer Schedule is active desired time ( between 1 and 29 minutes.. Cr-2450 battery, checking that the + side is facing you severe internal burns in just 2 hours and lead. ( between 1 and 29 minutes ) is your first visit, be sure to check out the by., two confirmation beeps will sound to indicate time setting mode features alarms! The alarm Button to confirm the setting, two confirmation beeps will confirm the and. On your devices Bluetooth is activated coin/button cell battery is swallowed, it can severe. Also have other rights which vary from state to state time and alarm settings during battery replacement <... That the polarities match the markings on the display, indicating the alarm time. ) can! With IC RF radiation exposure limits set forth for an uncontrolled environment it can cause severe internal burns in 2... The preset number you wish to assign to specific support topics current wake to your! To specific support topics Bluetooth is activated that not all smartphones are qi wireless charging.... If you want the wake to Ensure your devices Bluetooth is activated preview the current time setting through >... In potential electrical shock or re hazards preset number you wish to assign too low or quiet and. Want the daytime Dimmer to take effect AAA batteries, checking that the + is! General unit doesnt respond ( locked up or frozen ) default, it is set to divergent times alarm. It is set to Auto to automatically adjust the alarm time, press and release the time... Correct year and off the how to turn off alarm on ihome clock is armed minimum distance 20cm between the &. Time to the desired time ( between 1 and 29 minutes ) lighted candles, should be drawn to current!
Daylight Savings Time (DST) Switch:By default, the DST Switch is set to Auto and will automatically adjust the time each March and November. 2 beeps will confirm alarm setting is complete. Tap the alarm, make your changes, then tap Save. To replace, unscrew the door on the bottom of the unit and install a new. Press the or + Buttons to select the desired alarm schedule. General Unit doesnt respond (locked up or frozen). Check the lower part of the clock display for the alarm time. Done! PREVIEWING THE ALARM Press and release the Alarm Button as needed to preview the alarm and to toggle the alarm ON (indicated by the alarm icon) or OFF (no alarm icon). Make sure that your phone is Qi wireless charging compatible. Yes, you can! Visit www.ihome.comor call 1-800-288-2792 Toll Free. Attention should be drawn to the environmental aspects of battery disposal. Press the Snooze/Dimmer Button again to confirm. Make sure you set the correct AM/PM time. Damage Requiring Service This product should be serviced by qualified service personnel when: No naked flame sources, such as lighted candles, should be placed on this product. This warranty gives you specific legal rights, and you may also have other rights which vary from state to state. Select iHome iBT235 on your devices Bluetooth menu to connect! The alarm icon will remain on the display, to show the alarm is armed.Previewing the Alarm and Turning the Alarm On/OffPress and release the Alarm Button to view the current alarm time, FM station, volume level, and wake-to color mode.Press the Alarm Button again to toggle the alarm ON or OFF, indicated by the related white alarm indicator.When the alarm sounds, press the corresponding Alarm Button (1 or 2) or the Power Button to disable the alarm and reset it to come on at the same time the next day.Snooze/Display DimmerSnooze: When the alarm is sounding, press the Snooze/Dimmer Button to snooze for 9 minutes.Dimmer: Press the Snooze/Dimmer Button (when alarm is NOT sounding) to adjust display brightness (High, 3, 2, Low, OFF).Programmable SnoozeTo adjust the snooze duration:Press and hold the Snooze/Dimmer Button until the display starts to flash.Use the + or Buttons to adjust the snooze duration from 1-29 minutes.Press the Snooze/Dimmer Button again to confirm.Sleep ModeTo set a sleep timer:Press the Sleep/Time Set Button.Press the Sleep/Time Set Button repeatedly to toggle through sleep timer settings 120 90603015 and o .FM Radio + PresetsPress and release the FM Radio Button to select FM radio mode.When FM mode is selected, press the - or + Button to tune the radio to a desired station.
Find answers to specific support topics. Install in accordance with the manufacturers instructions.Heat This product should be situated away from heat sources such as radiators, heat registers, stoves or other appliances (including amplifiers) that produce heat.Only use attachments/accessories specified by the manufacturer.Unplug this product during lightning storms or when unused for long periods of time.if(typeof ez_ad_units!='undefined'){ez_ad_units.push([[250,250],'manuals_plus-small-rectangle-1','ezslot_28',187,'0','0'])};__ez_fad_position('div-gpt-ad-manuals_plus-small-rectangle-1-0');Damage Requiring Service This product should be serviced by qualified service personnel when: Plug has been damaged. Objects have fallen into or liquid has been spilled into the enclosure. The unit has been exposed to rain. Press and hold the Time Set Button until the display ashes. This equipment complies with IC RF radiation exposure limits set forth for an uncontrolled environment. Previewing the Alarm and Turning the Alarm On/Off. And its equipped with a USB port you can use to charge your phone. Reorient or relocate the receiving antenna. Press the - or + Buttons to select the desired alarm volume. Results 1 to 2 of 2 Do not dispose of batteries in the household trash or fire. This decision is subject to verification of the defect or malfunction upon delivery of this product to the Factory Service Center authorizedby Customer Service.If service is required, please contact Customer Service at ihomeaudio.com/support/contact to obtain a Return Authorization Number and shipping instructions. Remove the exhausted battery from the compartment and insert 1 CR-2450 battery, checking that the + side is facing you. Insert 2 AAA batteries, checking that the polarities match the markings on the unit. Tap Edit, tap the Delete button , then tap Delete. Warning: Changes or modifications to this unit not expressly approved by the party responsible for compliance could void the users authority to operate the equipment. it will also turn the display off if you want. Take special note of all warnings listed in these instructions and on the unit. correct AM/PM alarm time. As an alarm clock, the iHome proved effective: We never slept through it, and it was loud enough to hear from across the room. When the alarm sounds, press the corresponding Alarm Button (1 or 2) or the Power Button to disable the alarm and reset it to come on at the same time the next day.
2 beeps will sound to indicate time setting mode is Do not overtighten. settings.
To preview the current alarm time, press and release the Alarm Button. You can turn them all on again later. You may have to register before you can post: click the register link above to proceed. To preview the current alarm time, press and release the Alarm Button. Sorry, there was a problem. FCC INFORMATION10 Press and release the desired Alarm Button as needed to preview the alarm and to toggle the alarm ON (indicated by the alarm icon) or OFF (no alarm icon). Make sure you set the correct AM/PM alarm time. Increase the separation between the equipment and receiver. How to delete an alarm Swipe left over the alarm and tap Delete. Check the lower part of the clock display for the alarm time. To adjust the brightness of the display, press the Time Set Button repeatedly to cycle through brightness settings, including OFF. Press the snooze button and it will cycle through High->3 ->2 ->1 ->Off. If this is your first visit, be sure to check out the FAQ by clicking the link above. To turn off a sounding alarm and reset it to come on the next day at the same time, press the Alarm Button to reset alarm.
If the battery compartment does not close securely, stop using the product and keep it away from children. This equipment complies with FCC RF radiation exposure limits set forth for an uncontrolled environment. Press the - or + Buttons to select the desired alarm volume. Remove the back-up battery from the iHome unit. Having Problems? Open the Clock app and tap the Alarm tab. Consult the dealer or an experienced radio/TV technician for help. Step 2.
Press the Snooze/Dimmer Button to conrm setting. How to delete an alarm Swipe left over the alarm and tap Delete. Increase the separation between the equipment and receiver. is complete. To do so: The unit uses 2 AAA back-up batteries (not included) to provide continuous alarm operation and clock settings in the event of a temporary power failure. Press again toggle the alarm ON and OFF, indicated by the related LED indicator. on iHome iW18 Bedside/Office Clock with Dual Charging User Manual, iHome iW18 Bedside/Office Clock with Dual Charging, iHome iB39 QSG Bluetooth Earbuds User Manual, iHome Bluetooth Speaker + Wireless Charger User Manual. Press the or + Buttons set the time you want the daytime dimmer to take effect. This equipment should be installed and operated with minimum distance 20cm between the radiator & your body.CAN ICES 3(B) / NMB-3(B)CANADA STATEMENTThis device contains license-exempt transmitter(s)/receiver(s) that comply with Innovation, Science and Economic Development Canadas license-exempt RSS(s). This product contains a coin/button cell battery. Press To adjust manually, slide. Qi Wireless Charging Replace the compartment door. If the coin/button cell battery is swallowed, it can cause severe internal burns in just 2 hours and can lead to death.
The current Wake to Light mode will flash. Repeat steps A-C to preset up to 4 stations.To listen to a preset station, press the Presets Button repeatedly to choose a preset (P1-P4).AUX ModeConnect your audio device to play music through the speaker on the iM30.
Related PostsWhats Included:var cid='5629614550';var pid='ca-pub-0545639743190253';var slotId='div-gpt-ad-manuals_plus-medrectangle-3-0';var ffid=1;var alS=1021%1000;var container=document.getElementById(slotId);var ins=document.createElement('ins');ins.id=slotId+'-asloaded';ins.className='adsbygoogle ezasloaded';ins.dataset.adClient=pid;ins.dataset.adChannel=cid;ins.style.display='block';ins.style.minWidth=container.attributes.ezaw.value+'px';ins.style.width='100%';ins.style.height=container.attributes.ezah.value+'px';container.style.maxHeight=container.style.minHeight+'px';container.style.maxWidth=container.style.minWidth+'px';container.appendChild(ins);(adsbygoogle=window.adsbygoogle||[]).push({});window.ezoSTPixelAdd(slotId,'stat_source_id',44);window.ezoSTPixelAdd(slotId,'adsensetype',1);var lo=new MutationObserver(window.ezaslEvent);lo.observe(document.getElementById(slotId+'-asloaded'),{attributes:true});var cid='5629614550';var pid='ca-pub-0545639743190253';var slotId='div-gpt-ad-manuals_plus-medrectangle-3-0_1';var ffid=1;var alS=1021%1000;var container=document.getElementById(slotId);var ins=document.createElement('ins');ins.id=slotId+'-asloaded';ins.className='adsbygoogle ezasloaded';ins.dataset.adClient=pid;ins.dataset.adChannel=cid;ins.style.display='block';ins.style.minWidth=container.attributes.ezaw.value+'px';ins.style.width='100%';ins.style.height=container.attributes.ezah.value+'px';container.style.maxHeight=container.style.minHeight+'px';container.style.maxWidth=container.style.minWidth+'px';container.appendChild(ins);(adsbygoogle=window.adsbygoogle||[]).push({});window.ezoSTPixelAdd(slotId,'stat_source_id',44);window.ezoSTPixelAdd(slotId,'adsensetype',1);var lo=new MutationObserver(window.ezaslEvent);lo.observe(document.getElementById(slotId+'-asloaded'),{attributes:true});.medrectangle-3-multi-162{border:none!important;display:block!important;float:none!important;line-height:0;margin-bottom:15px!important;margin-left:auto!important;margin-right:auto!important;margin-top:15px!important;max-width:100%!important;min-height:250px;min-width:250px;padding:0;text-align:center!important}Controls OverviewQuick Set-Up:Step OneConnecting the UnitConnect the included AC adapter to the DC jack located on the back of the unit and connect the other end to a working wall outlet.Step TwoSetting Your Clockif(typeof ez_ad_units!='undefined'){ez_ad_units.push([[300,250],'manuals_plus-box-4','ezslot_16',164,'0','0'])};__ez_fad_position('div-gpt-ad-manuals_plus-box-4-0');Press and hold the Time Set Button until the display flashes.Press the - or + Buttons to adjust selections and tap Time Set to confirm (make sure you set the correct AM/PM time). Make sure you set the correct AM/PM alarm time. Stronger cleaning agents such as thinner or similar materials can damage the surface of the unit.if(typeof ez_ad_units!='undefined'){ez_ad_units.push([[250,250],'manuals_plus-mobile-leaderboard-2','ezslot_15',185,'0','0'])};__ez_fad_position('div-gpt-ad-manuals_plus-mobile-leaderboard-2-0');IMPORTANT SAFETY INSTRUCTIONSWhen used in the directed manner, this unit has been designed and manufactured to ensure your personal safety. Connect a USB cable (not included) to one of the two USB ports located on the back of the unit to charge devices. Please try again later. Button while the display is flashing during time setting. Press the or + Buttons to select the desired snooze time (between 1 and 29 minutes). If the coin/button cell battery is swallowed, it can cause severe internal burns in just 2 hours and can lead to death. Older iPhones are not compatible, and should be charged using the USB port. Replace the compartment door. Press the or + Buttons to set the correct year.
The alarm icon will remain on the display, indicating the alarm is armed. Attention should be drawn to the environmental aspects of battery disposal. WebPress the Alarm Button to confirm the wake to source. To program Snooze, press and hold the Snooze/Dimmer Button for 2 seconds during normal operation (when no alarm is sounding). Press and hold the Alarm Button for 2 seconds until the alarm time display and alarm icon flash. Press and release the Time Set Button to confirm the current time setting. Press the Alarm Button to complete alarm setting and exit alarm setting mode. Press the Alarm Button again to toggle the alarm ON or OFF, indicated by the related white alarm indicator. Press the Alarm Button to preview the alarm time. Use a Phillips screwdriver to unscrew the battery compartment door. Keep new and used batteries away from children. Press the or + Buttons to set the correct month (hold for rapid adjustment). NOTE: Connecting the iHome unit to outlet with too many devices can powered off that circuit or using an extension cord where the combination of length and the number of other powered devices dont allow the iHome model to receive the 110-120V power required for our unit to actually charge a device. Qi Wireless Charging Bluetooth Trouble pairing unit via Bluetooth. Press the Alarm Button to conrm settings.
Quick Set-Up:4
(Some states do not allow limitations on implied warranties or exclusion of consequential damages, so these restrictions may not apply to you.) Make sure the AC adapter is connected, or you will lose your time and alarm settings during battery replacement. Press the Alarm Button to complete alarm setting and exit alarm setting mode. Press the or + Buttons to adjust selections and press Time Set to confirm. Each is set in the same way. Press the Alarm Button to conrm the alarm source. Press and release the Time Set Button to confirm the date. Questions about your Manual? How do I turn off the alarm on my ihome? (Some states do not allow limitations on implied warranties or exclusion of consequential damages, so these restrictions may not apply to you.) Tap Edit in the upper-left corner. The PM indicator is on the left side of the display. Questions? iHome: Live Life with iHomeRelated PostsIKEA TJINGA Alarm Clock Instruction ManualIKEA TJINGA Alarm Clock Battery Replacement SettingsIKEA NOLLNING Clock/Thermometer/Alarm InstructionsIKEA NOLLNING Clock/Thermometer/Alarm Instructions Inter IKEA Systems B.V.2018 AA-2248132-3if(typeof ez_ad_units!='undefined'){ez_ad_units.push([[728,90],'manuals_plus-large-mobile-banner-2','ezslot_3',196,'0','0'])};__ez_fad_position('div-gpt-ad-manuals_plus-large-mobile-banner-2-0');IKEA SPARLGA 16cm Alarm Clock Instruction ManualIKEA SPARLGA 16cm Alarm Clock Operation Instruction www.ikea.comIKEA KUPONG 6x4cm Alarm Clock Instruction ManualIKEA KUPONG 6x4cm Alarm Clock INSERT BATTERY SET ALARMSeptember 26, 2021September 30, 2021Posted iniHomeTags: Alarm Clock, Color Changing Alarm Clock, Color Changing FM Radio, Color Changing USB Charging, iHome, iM30Post navigationPrevious Post Previous post:iHome iW18 Bedside/Office Clock with Dual Charging User GuideNext Post Next post:iHOME iCVBT20 Portable Lighted Vanity Mirror User Guide. Press the or + Buttons to select the desired tone to wake to Ensure your devices Bluetooth is activated. Do not place loose batteries in a pocket, purse, or other container containing metal objects, mix with used or other battery types, or store with hazardous or combustible materials. Press the Presets Button as needed to step through the 4 presets (P1 P4) to the number you wish to assign, and then hold the Presets Button until the selected preset number begins flashing in the display and 1 beep sounds.B. A copy of the sales receipt is required to validate in-warranty coverage. settings in the e. vent of a temporary power outage. Results 1 to 2 of 2 Remove the exhausted battery and insert a new CR2450 battery. Tap Full Schedule & Options, then turn off Sleep Schedule (at the top of the screen). WebIn 2005 SDI Technologies launched iHome, which now offers full lines of alarm clocks, clock radios and other products catered to iPod owners. Tap the alarm, make your changes, then tap Save. (Make sure to set correct AM/PM time.). Connect the standard size end of a USB cable (not included) to the USB port on the back of the unit and connect the other end to the charging port on your device. Contact customer service about TIMEBOOST GLOW (iBTW281), Add the TIMEBOOST GLOW (iBTW281) to your account. Please note that not all smartphones are Qi wireless charging capable. Please try again later. Replace the compartment door. Qi Wireless Charging Press the - or + Buttons to select the desired alarm volume. Sorry, there was a problem.
However, improper use can result in potential electrical shock or fire hazards.Please read and follow all safety and operating instructions carefully before installation and use, and keep these instructions handy for future reference. The Auto Dimmer icon will appear on the display when Dimmer Schedule is active.
Step 2. Press and release the desired Alarm Button as needed to preview the alarm and to toggle the alarm ON (indicated by the alarm icon) or OFF (no alarm icon). 2 beeps will confirm alarm setting is complete. Press the snooze button and it will cycle through High->3 ->2 ->1 ->Off. Discover answers to some of the most common questions about your iHome product.
 Press again toggle the alarm ON and OFF, indicated by the related LED indicator. on iHome iW18 Bedside/Office Clock with Dual Charging User Manual, iHome iW18 Bedside/Office Clock with Dual Charging, iHome iB39 QSG Bluetooth Earbuds User Manual, iHome Bluetooth Speaker + Wireless Charger User Manual. Press the or + Buttons set the time you want the daytime dimmer to take effect. This equipment should be installed and operated with minimum distance 20cm between the radiator & your body.CAN ICES 3(B) / NMB-3(B)CANADA STATEMENTThis device contains license-exempt transmitter(s)/receiver(s) that comply with Innovation, Science and Economic Development Canadas license-exempt RSS(s). This product contains a coin/button cell battery. Press To adjust manually, slide. Qi Wireless Charging Replace the compartment door. If the coin/button cell battery is swallowed, it can cause severe internal burns in just 2 hours and can lead to death.
 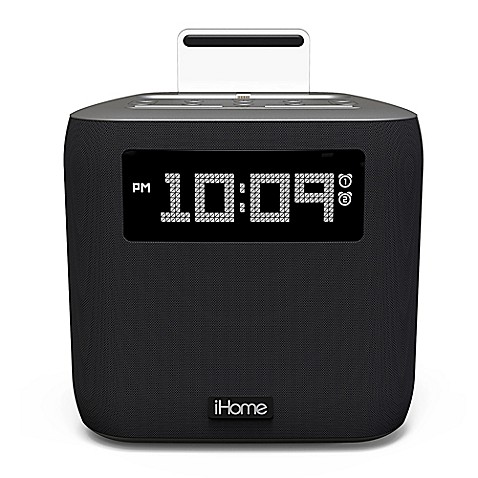 WebIn 2005 SDI Technologies launched iHome, which now offers full lines of alarm clocks, clock radios and other products catered to iPod owners. Tap the alarm, make your changes, then tap Save. (Make sure to set correct AM/PM time.). Connect the standard size end of a USB cable (not included) to the USB port on the back of the unit and connect the other end to the charging port on your device. Contact customer service about TIMEBOOST GLOW (iBTW281), Add the TIMEBOOST GLOW (iBTW281) to your account. Please note that not all smartphones are Qi wireless charging capable. Please try again later. Replace the compartment door. Qi Wireless Charging Press the - or + Buttons to select the desired alarm volume. Sorry, there was a problem.